Food Preparation Appliances: Find the Right Tool for Every Task
Food preparation appliances change ingredients before cooking or serving: they blend, chop, slice, mix, extract juice, or grind. The right appliance depends first on the result you want, then on batch size, recipe frequency, cleanup, and available space.
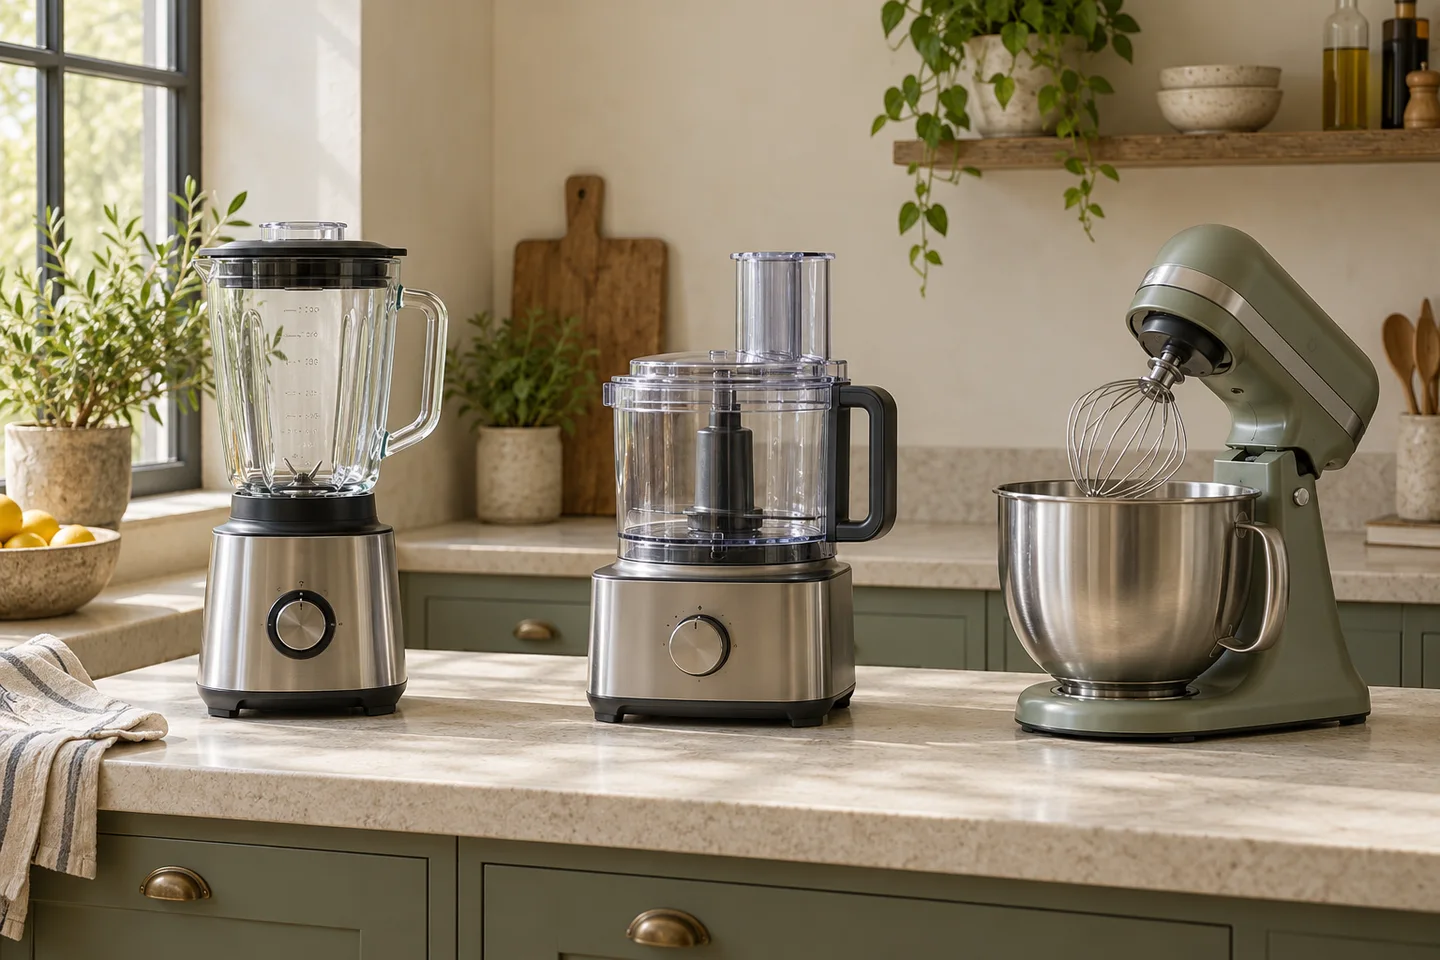
Which Food Preparation Appliance Fits the Task?
Choose by the food's intended texture and shape. Blenders break ingredients down into smooth mixtures; food processors and choppers cut them into pieces or shreds; mixers combine and aerate without using cutting blades. Juicers separate liquid from much of the pulp. Grinders, slicers, and mills make more specialized cuts or particles. Some recipes overlap, but these core mechanisms explain which family to consider first.
| Preparation task | Start with | Why it fits | Check before relying on it |
|---|---|---|---|
| Smoothies, pureed soups, and pourable sauces | Countertop or immersion blender | Blades break down ingredients into a relatively uniform mixture | Batch size, ingredient consistency, and hot-food instructions |
| Chopped onions, herbs, vegetables, or coarse dips | Food chopper or food processor | A cutting blade can reduce food in controlled pulses | Bowl size and the risk of turning a coarse mixture into a paste |
| Repeated slicing or shredding of vegetables or cheese | Food processor with the appropriate disc | A disc makes cuts that a basic chopping blade cannot | Included discs, feed-tube dimensions, and compatible ingredients |
| Whipped cream, beaten egg whites, frosting, or cake batter | Hand or stand mixer | Beaters or whisks mix ingredients and incorporate air | Mixing volume and whether the mixture is too heavy for the appliance |
| Bread or pizza dough | Dough-capable stand mixer or food processor | A dough hook or suitable processing blade can develop and combine dough | The appliance's stated dough capacity and operating limits |
| Fruit or vegetable juice with much of the pulp removed | Juicer | It extracts liquid and separates the remaining solids | Produce compatibility and cleaning of strainers or filters |
| Ground meat, thin food slices, or milled dry ingredients | Purpose-built grinder, slicer, or mill | Each uses a cutting or grinding mechanism for a specific result | Exact ingredient suitability, guarding, and disassembly for cleaning |
When two appliances can do the same job
Smooth dips, dressings, and some sauces can be made in either a blender or a food processor. The blender is the more natural starting point for a flowing, fine puree; the processor gives more control over coarse texture and can handle related chopping tasks. The recipe's moisture and the appliance's operating instructions still matter.
Some food processors can prepare dough, and some stand mixers accept slicing or grinding attachments. Those abilities depend on the supplied tool and compatible accessories, not the appliance family name alone. A stand mixer without a grinder attachment does not grind meat; a basic chopper does not become a slicer just because it has a sharp blade.
Blenders and Immersion Blenders: When Smooth Texture Matters
A blender is the right starting point when the goal is a smoothie, a fine puree, or a sauce with a blended texture. Choose a countertop jar for contained batches, a personal cup for individual cold drinks, or an immersion blender for blending directly in a suitable pot or container. Frozen ingredients, thick mixtures, and hot foods require features and instructions specific to the appliance.
Countertop jar blenders
A countertop blender has a motorized base and a jar with blades near the bottom. The jar shape and moving liquid help carry ingredients back toward the blades, making this design useful for consistently blended drinks, soups, and sauces.
- Suitable for: Multiple servings, pourable purees, and frozen drinks when the blender is rated for ice or frozen ingredients.
- Main tradeoff: Food must be transferred into the jar, which also needs counter or storage space.
- Check: The working fill range, lid design, and whether small or thick batches can circulate properly.
Personal blenders and small-batch cups
Personal blenders use smaller cups for individual portions. Some cups attach directly to a blending base and accept a drinking lid afterward; other designs are small jars for sauces or dressings.
- Suitable for: Single cold smoothies, shakes, and small quantities of relatively fluid ingredients.
- Main tradeoff: Cup size restricts batch volume, and dense or frozen recipes may exceed the permitted workload.
- Check: Maximum fill markings, ingredient restrictions, and hot-liquid warnings. Many sealed personal blending cups prohibit blending hot ingredients.
Immersion or stick blenders
An immersion blender places a small rotating blade at the end of a handheld shaft. It works within a sufficiently deep bowl, pitcher, or saucepan, so a soup or sauce can be pureed without pouring it into a separate jar.
- Suitable for: In-pot soups, sauces, dressings, and small-to-medium portions that can surround the blade guard.
- Main tradeoff: You guide the tool by hand; splashing and uneven texture are more likely if the blade is exposed or the container is too shallow.
- Check: Shaft reach, permitted immersion depth, cookware protection, and whether chopping or whisking requires a separate attachment.
Four checks that affect the result
- Ingredient movement. Blending depends on food returning to the blades. A mixture that stalls or forms an air pocket may need an approved pulse setting, a recipe adjustment, or a manufacturer-approved tamper. Stop the motor before scraping a jar.
- Usable volume. A large jar can struggle with a very small portion, while a small cup cannot accommodate a family batch. Use working fill marks rather than treating the container's full volume as usable capacity.
- Temperature and frozen-food limits. Do not assume that every jar can process hot soup or crush ice. Follow the specific guidance for cooling, venting, lid security, batch size, and frozen ingredients; never use a sealed personal cup for hot blending unless its instructions expressly permit it.
- Control and cleaning. Variable speed and pulse controls help adjust texture. Check how the jar, seals, blade area, and detachable attachments are cleaned, and keep the motor housing out of water. For immersion blending, place the blade in the mixture before starting, stop it before lifting it out, and remove a hot pan from the active burner first.
Food Processors and Choppers: Cutting, Slicing, and Shredding
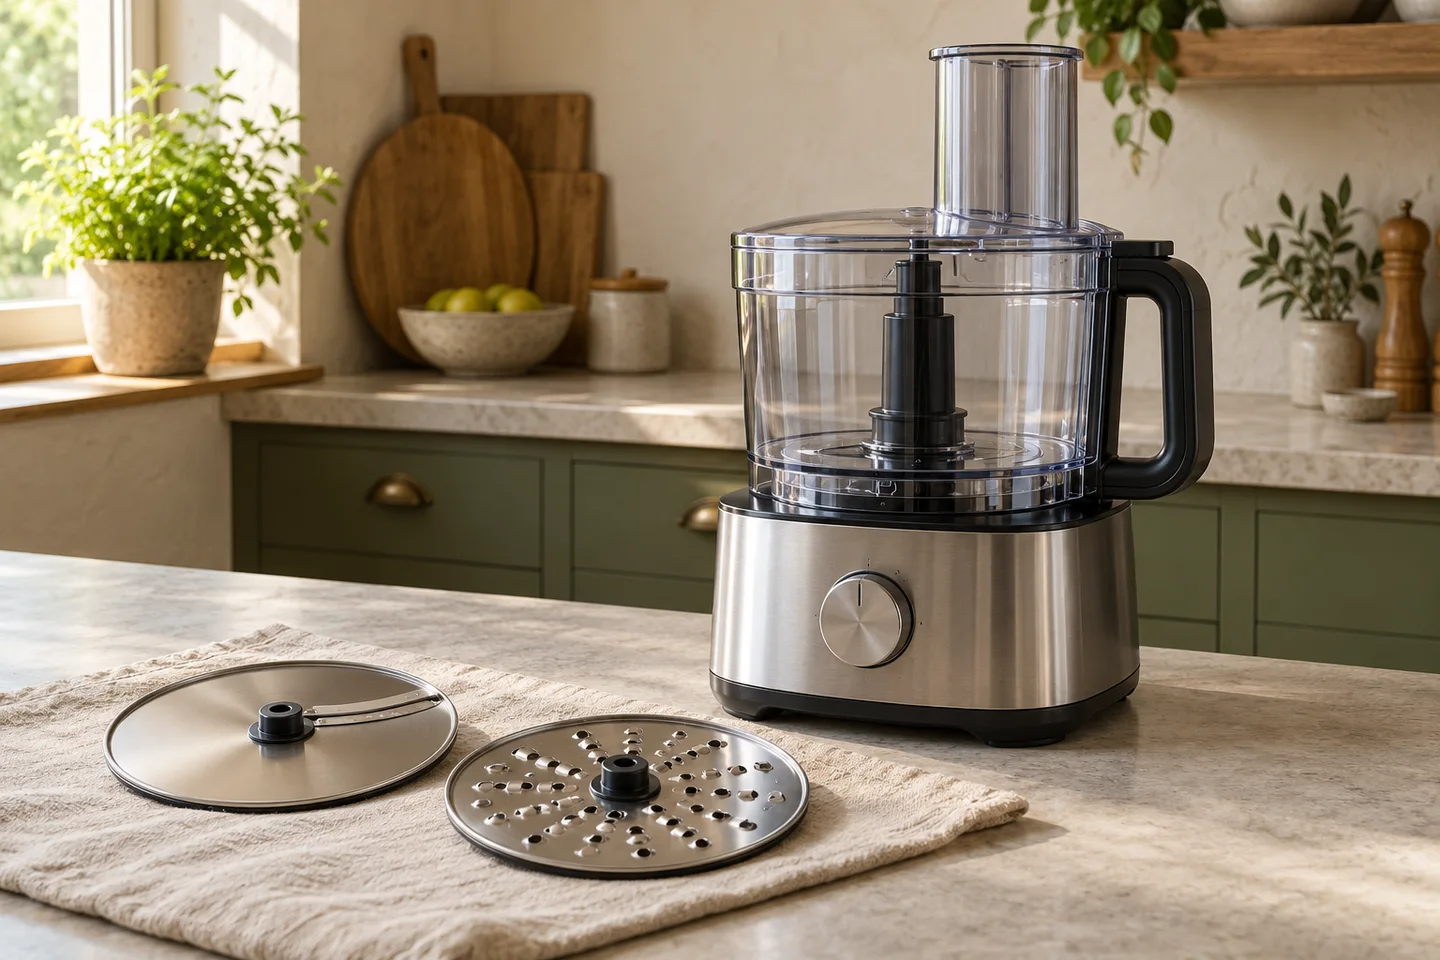
A food processor is useful when ingredients need to be chopped, sliced, shredded, or mixed without necessarily becoming a smooth liquid. A compact chopper generally handles small portions with a multipurpose cutting blade. A larger food processor typically adds a feed tube and interchangeable discs that make slices or shreds. The attachment matters: running a chopping blade longer makes pieces progressively finer, but it does not produce the defined cuts of a slicing or shredding disc.
Compact food choppers
A mini chopper uses a small work bowl and usually one rotating blade. Short pulses are useful for mincing herbs, onions, garlic, or nuts, while longer processing can make dips, dressings, and coarse purees.
- Suitable for: Small, frequent chopping jobs and sauces made in limited quantities.
- Main tradeoff: The bowl fills quickly, and most choppers lack the feed tube and cutting discs needed for slices or shreds.
- Check: Usable bowl volume, pulse control, and how easily food can be removed from around the blade.
Full-size food processors
A batch-bowl processor combines a wider work bowl with a central cutting blade and, commonly, discs positioned above the bowl. Ingredients pass through a feed tube onto the selected disc for slicing or shredding; a pusher keeps hands away from the cutting area.
- Suitable for: Repeated vegetable prep, shredding cheese, larger chopped mixtures, and recipes needing more than one cutting action.
- Main tradeoff: More discs, adapters, and bowl parts require storage and cleaning.
- Check: Feed-tube shape, actual disc selection, bowl capacity, and whether specialty functions are included or supported separately.
What each blade or disc produces
| Cutting tool | Typical result | Important distinction |
|---|---|---|
| Multipurpose S-shaped blade | Chopped pieces, minced mixtures, or puree | Pulse for a coarser texture; extended running keeps reducing the pieces |
| Slicing disc | Flat slices of vegetables or other suitable ingredients | Thickness depends on the disc or its adjustment; it does not dice |
| Shredding or grating disc | Strips or grated particles of suitable vegetables and cheese | The disc's hole or tooth pattern determines the cut, not the pulse duration |
| Dicing attachment or grid | More regularly shaped diced pieces | Only available with compatible equipment and the required parts |
| Dough blade | Combines and works dough instead of making vegetable cuts | Use only for supported dough types and batch limits |
Practical checks before processing
- Match the bowl to the recipe. A bowl's stated capacity is not automatically its usable liquid or chopping limit. Follow the relevant fill markings and reduce the batch if ingredients crowd the blade or threaten to leak.
- Match the feed tube to the ingredient. The tube's width affects how much trimming is needed, while the way an ingredient is positioned influences its slices. Always use the provided food pusher, never fingers or a utensil, to feed food toward a rotating disc.
- Control the cut. Use brief pulses and inspect the result when distinct chopped pieces matter. For disc work, select the intended cutting side and follow the appliance's guidance for ingredient firmness and feed pressure.
- Allow for cleanup. Stop and disconnect power before opening or changing attachments. Remove sharp blades and discs by their designated hubs or grips, then clean and store them according to the specific instructions.
Hand and Stand Mixers: Combining, Whipping, and Kneading
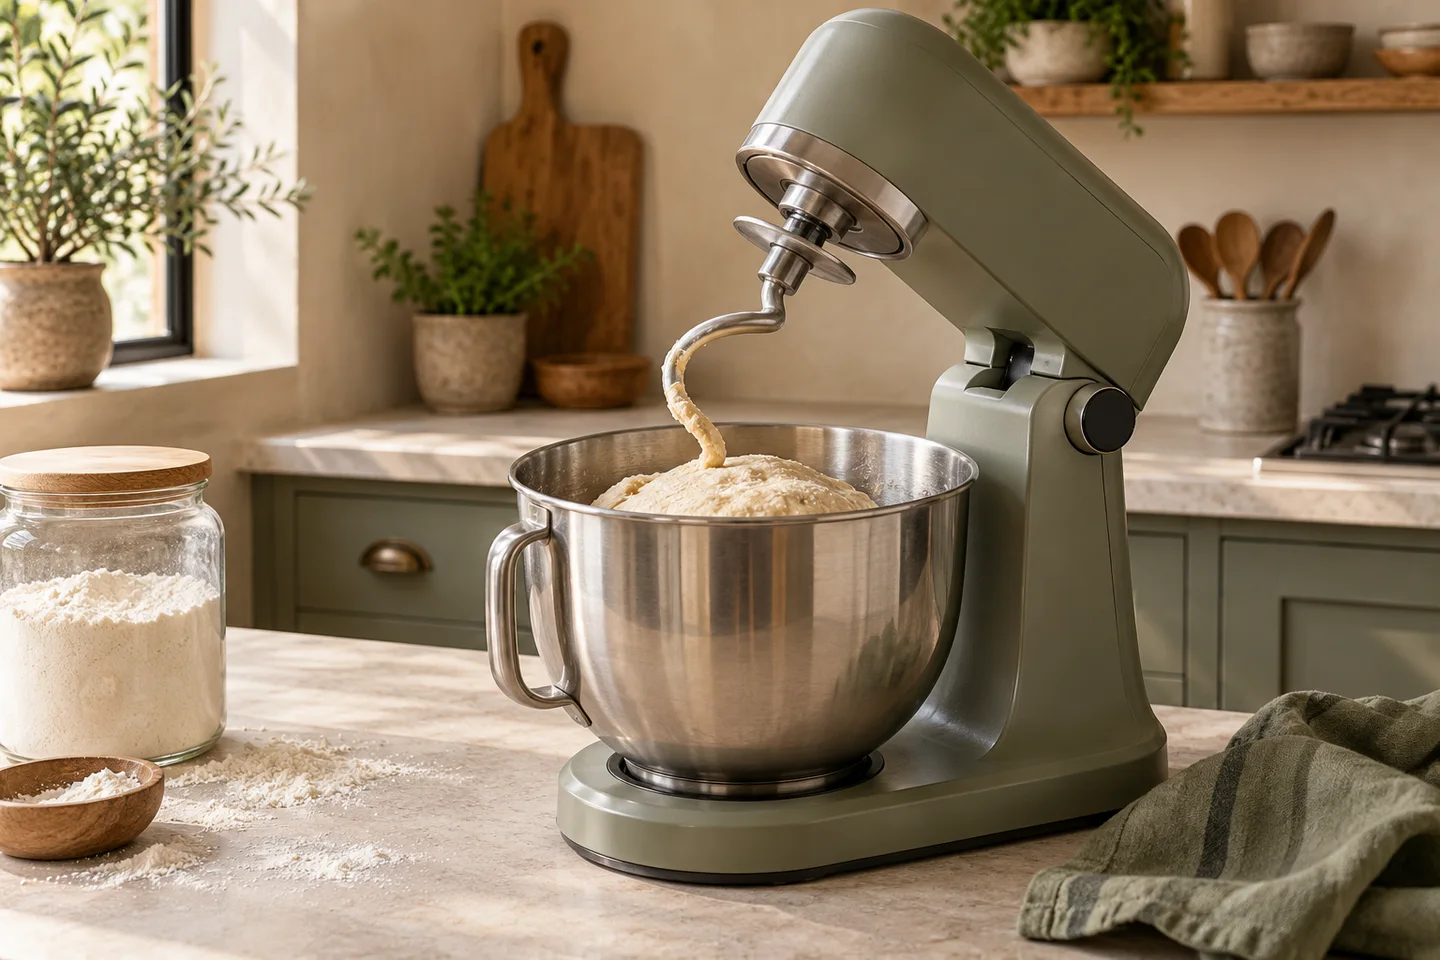
Choose a mixer when a recipe needs ingredients combined, air whipped into a mixture, or dough worked without chopping the ingredients into smaller pieces. A hand mixer suits shorter, lighter jobs that you can guide around a bowl. A stand mixer supports a bowl and mixing tool mechanically, making longer mixing and some denser dough tasks more manageable. In either design, the attachment and the appliance's stated workload limits determine what it can do.
Hand mixers
An electric hand mixer is held over a separate mixing bowl and usually drives two removable beaters. It is useful when the operator can move the beaters through the mixture and control the mixing time directly.
- Suitable for: Cake and pancake batters, eggs, whipped cream, frostings, and occasional smaller recipes.
- Main tradeoff: The user supports and moves the mixer; prolonged work or stiff mixtures can be tiring and may overload a light-duty design.
- Check: Low-speed control, beater or whisk options, and whether dough hooks are specifically supported for the intended batch.
Stand mixers
A stand mixer holds its mixing bowl at the base while a powered attachment works through the ingredients. Common home designs use a tilting head for access or a bowl-lift mechanism that raises the bowl toward a fixed head. Bowl-lift and tilt-head describe access and support geometry, not a universal ranking of mixing strength.
- Suitable for: Repeated baking, larger batters, creaming, whipping, and bread or pizza dough within the mixer's rated capability.
- Main tradeoff: A stand mixer occupies more space, is harder to move, and adds a bowl and accessories to clean.
- Check: Bowl access, cabinet clearance, stability during heavy mixing, and clearance between the chosen tool and bowl.
Match the mixing tool to the recipe
| Tool | Main action | Typical use | Limit to remember |
|---|---|---|---|
| Standard hand-mixer beaters or stand-mixer flat beater | Combines and beats ingredients | Cake batter, cookie dough, butter-and-sugar mixtures | Not a substitute for a dough hook on demanding yeast dough |
| Wire whisk or whip | Incorporates air into suitable mixtures | Egg whites, whipped cream, light frostings | Thick dough or dense batters can damage or strain a whisk |
| Dough hook | Pulls and folds dough during kneading | Yeast breads, rolls, pizza dough | Only use approved dough types, speeds, and batch sizes |
| Optional flexible-edge or pastry beater | Scrapes the bowl or cuts solid fat into flour, depending on its design | Creamed mixtures or certain pastry preparations | Functions and fit depend on the exact attachment and mixer |
How to judge dough workload
- Use the stated dough limit. Bowl volume is a space measurement, not a guarantee of how much stiff dough the motor and gearing can knead. Look for applicable flour or total dough quantities and recipe restrictions in the instructions.
- Consider dough stiffness and mixing time. A soft batter, hydrated bread dough, and stiff dough place different demands on the tool. Follow the prescribed kneading speed and duration rather than assuming faster mixing is better.
- Check attachment compatibility. Hand mixers with dough hooks may handle some yeast dough recipes, but the hooks do not turn every hand mixer into a heavy-duty kneader. Likewise, pasta rollers, grinders, and slicers require compatible stand-mixer drive fittings; they are not inherent mixing functions.
Stop the mixer and disconnect power before replacing beaters, whips, hooks, or bowls. Keep hands and utensils clear of moving attachments.
Juicers: Extracting Liquid From Produce
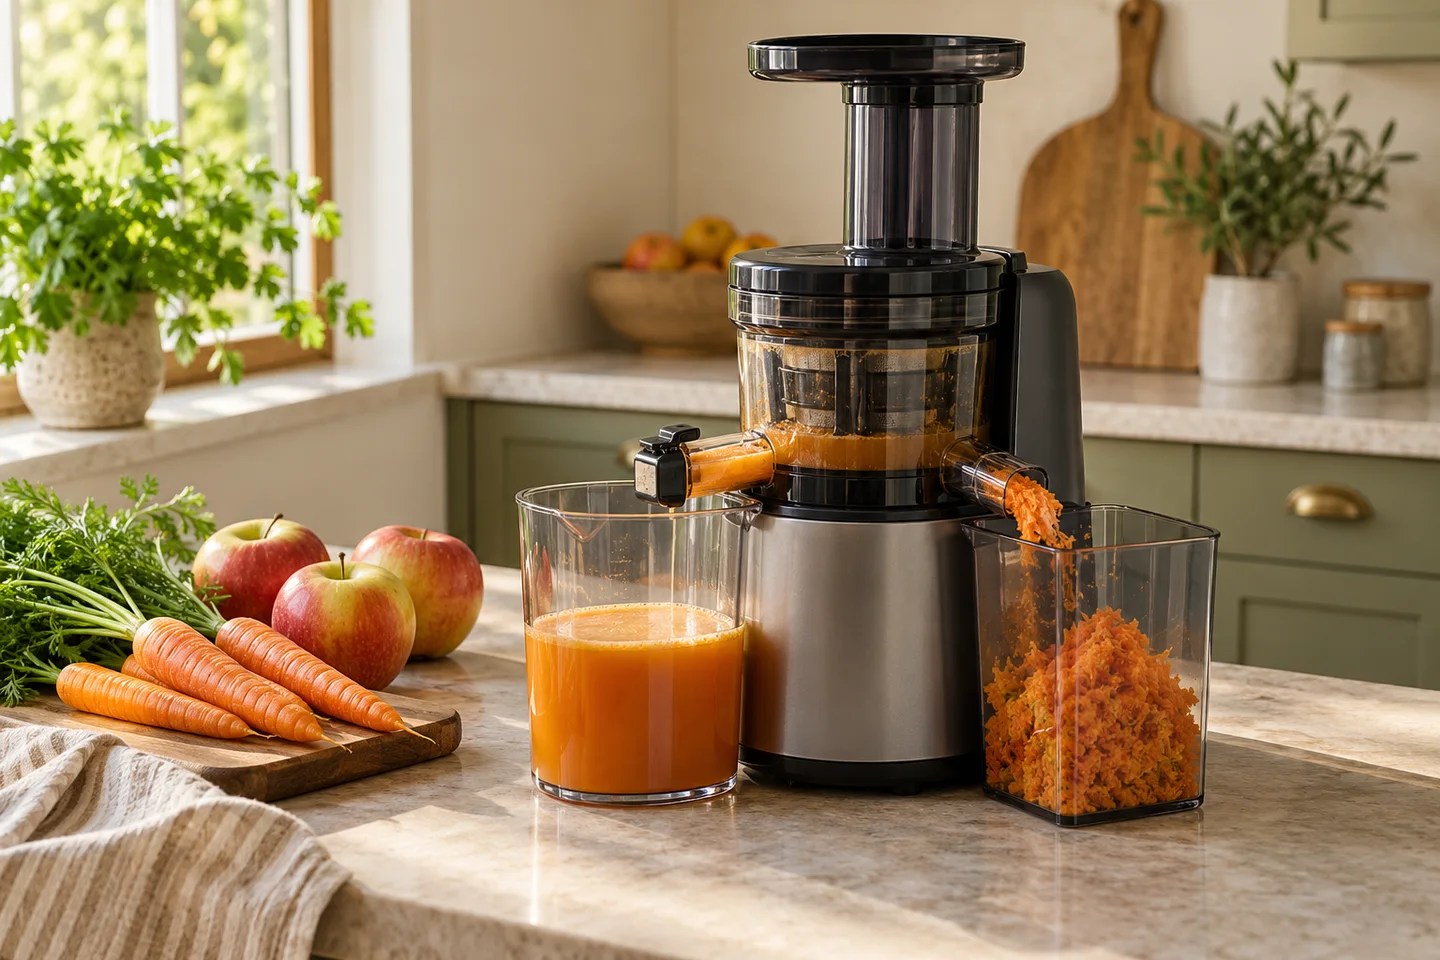
A juicer extracts liquid while separating out much of the solid pulp. A citrus press is a focused tool for oranges, lemons, and similar fruit; centrifugal and slow-auger juicers handle a wider range of produce. Choose by what you plan to juice, how much preparation and strainer cleaning you can manage, and whether you actually want pulp removed. A juicer and a blender do not make the same kind of drink.
Citrus reamers and presses
Manual and powered citrus juicers press halved fruit against a ridged cone or use a lever to squeeze it. A strainer catches seeds and some pulp, although the amount of pulp in the juice varies by design.
- Suitable for: Oranges, grapefruit, lemons, limes, and other compatible citrus fruit.
- Main tradeoff: A simple, narrow-purpose tool; it cannot extract juice from carrots or leafy greens.
- Check: Fruit-size fit, stability while pressing, pulp-strainer design, and how easily the cone and collection parts come apart for washing.
Centrifugal juicers
A centrifugal juicer typically shreds produce against a rapidly rotating grating surface. The spinning basket pushes liquid through a fine screen while the remaining pulp is collected separately.
- Suitable for: Extracting juice from supported fruits and vegetables, including many firm ingredients.
- Main tradeoff: The feed and extraction action can be quick, but the screen and pulp path need thorough cleaning. Soft or leafy ingredients may behave differently from firm produce.
- Check: Feed-chute opening, ingredient restrictions, whether produce needs cutting, and access to the mesh filter after use.
Slow or masticating juicers
A slow juicer uses a rotating auger to crush and press ingredients against a strainer, separating juice from pulp without the fast-spinning grater used in centrifugal designs. Some designs accommodate leafy greens and fibrous produce, but the permitted ingredients and feeding method vary.
- Suitable for: Mixed fruit and vegetable juices, particularly when the appliance is specified for greens or fibrous ingredients.
- Main tradeoff: Feeding can take more time, and the auger, screen, and seals add surfaces to clean.
- Check: Produce-cutting requirements, reverse or jam-clearing instructions, strainer options, and whether all food-contact parts are accessible.
Juice or blended produce?
| Desired result | Appropriate tool | What happens to the solids |
|---|---|---|
| Fresh citrus juice | Citrus reamer or press | Seeds and some pulp are strained; pulp level depends on the tool |
| Extracted fruit or vegetable juice | Centrifugal or slow juicer | Much of the pulp is separated into a collection area |
| Smoothie or whole-produce puree | Blender | The edible pulp and its fiber remain in the mixture |
Juicing removes much of the fiber present in whole produce. It is not inherently more nutritious than eating whole fruit or vegetables, and neither centrifugal nor slow extraction guarantees better nutrient retention or juice yield across all ingredients.
Practical checks for fresh juice
- Prepare compatible ingredients. Wash produce under running water, remove damaged portions, and follow the instructions for peeling, seed removal, and cutting. A wide feed chute does not mean every ingredient can go in whole.
- Count the cleanup. Fine filters, pulp outlets, and seals can trap particles. Check whether they are removable and whether the supplied cleaning method reaches each food-contact surface.
- Handle untreated juice carefully. Freshly extracted juice is not pasteurized by the juicer. Keep the equipment clean and consume fresh juice promptly; refrigerate it if it will not be consumed immediately. People at higher risk of foodborne illness should choose pasteurized or otherwise appropriately treated juice rather than untreated fresh juice.
Grinders, Slicers, and Mills: Specialized Ingredient Prep
Use a specialized cutter when the result needs a particular shape or particle size: a meat grinder forces food through a perforated plate, a food slicer cuts repeated slices against an adjustable guide, and a grain mill reduces dry kernels to meal or flour. Small spice and coffee grinders handle another kind of dry grinding. A general-purpose chopper may break up these ingredients, but it does not reproduce every controlled cut or grind.
Meat grinders and grinding attachments
A typical meat grinder uses a rotating screw to move food toward a knife and a perforated grinding plate. Manual hand-cranked grinders, dedicated electric machines, and compatible stand-mixer attachments use variations of this arrangement. Plate-hole size helps determine the coarseness of the output.
- Suitable for: Preparing ground meat and other ingredients expressly supported by the grinding head.
- Main tradeoff: Grinding adds a feed tube, knife, plate, and screw that must be taken apart and cleaned, particularly after raw meat.
- Check: Available plate-hole sizes, approved ingredients, feed-tube access, and whether a mixer-powered attachment fits the exact drive connection.
Electric food slicers
An electric food slicer uses a rotating circular blade and a sliding carriage. An adjustable guide plate sets the distance that determines slice thickness, while a food pusher helps keep hands away from the blade. This is different from a food processor's slicing disc and feed tube.
- Suitable for: Repeated slices of cooked meat, cheese, bread, or other foods permitted by the slicer's blade and instructions.
- Main tradeoff: The exposed cutting edge is hazardous during setup and cleaning, and the carriage, guide, and blade area take space and attention.
- Check: Thickness adjustment, food size and carriage travel, guard and pusher arrangement, and safe access for cleaning behind the blade.
Grain mills for flour and meal
Many grain mills grind kernels between burrs or milling stones. An adjustment changes the grind from coarse meal toward finer flour; the range depends on the milling mechanism. Standalone mills and compatible mixer attachments have different drives, but both need grain that the particular mill can process.
- Suitable for: Milling approved dry grains, such as wheat or rye, for baking or cooking.
- Main tradeoff: Fine milling can create flour dust, and some mills require additional passes or adjustments for a finer result.
- Check: Supported grain types, fineness range, batch or running limits, and cleaning instructions. Many grain mills prohibit oily nuts, coffee beans, or moist ingredients because they can clog the grinding surfaces.
Spice and coffee grinders
Compact blade grinders repeatedly cut and break dry ingredients in a small chamber. Grind time influences the result, but particle sizes can be uneven. Burr-style coffee grinders instead crush beans between grinding surfaces with an adjustable spacing. Some blade grinders accept dried spices, seeds, or nuts; others are restricted to particular ingredients.
- Suitable for: Small batches of dried spices or coffee beans in a grinder specifically approved for them.
- Main tradeoff: Grinding bowls can retain aromas and fine particles, especially when alternating between spices and coffee.
- Check: Dry-versus-oily ingredient restrictions, removable bowl or burr access, grind adjustment, and cleaning between strongly flavored ingredients.
The part that controls the result
| Appliance | Key cutting or grinding part | What to verify |
|---|---|---|
| Meat grinder | Knife and perforated plate | Plate-hole size and suitability for the ingredient |
| Electric food slicer | Circular blade and thickness guide | Adjustable slice range and food-carriage capacity |
| Grain mill | Burrs or stones with a grind adjustment | Coarse-to-fine range and permitted grain moisture and oil content |
| Small blade grinder | Rotating cutting blade | Batch limit and whether grind duration gives the required texture |
Grinding raw meat at home does not make it inherently safer. Grinding can spread bacteria from the surface throughout the meat, so keep ingredients cold, prevent contact with ready-to-eat foods, and thoroughly clean food-contact parts after use. Switch off and unplug cutting appliances before changing plates, removing blades, or cleaning their mechanisms.
Capacity, Motor Claims, and Attachments: What to Check
The most useful appliance specification is the one that describes your actual task. A large container does not guarantee a large usable batch, and a higher motor-wattage figure does not establish faster chopping, smoother blending, or greater dough capacity. Start with the ingredient, finished texture, and batch size; then check the appliance's permitted load, operating limits, and supplied cutting or mixing tools.
Capacity: compare the working limit, not just the container
A capacity label usually describes the physical container, but an operating limit can be lower or depend on the recipe. Read the stated unit and the condition it applies to.
| Appliance | Common capacity figure | More useful check |
|---|---|---|
| Countertop blender | Jar volume in ounces, cups, or liters | Maximum working fill, minimum practical batch, and separate hot-food or frozen-ingredient instructions |
| Food processor | Work-bowl volume in cups or liters | Liquid fill limit, solid-food processing capacity, and feed-tube opening |
| Stand mixer | Bowl volume in quarts or liters | Supported flour or dough load for the recipe, plus whether the mixing tool reaches small batches |
| Juicer | Juice container or pulp-bin volume | Whether the selected produce can be processed and how often the containers must be emptied |
| Grinder or food slicer | Feed opening, tray, or carriage dimensions | Ingredient size, cutting or grinding setup, and the applicable batch or running limit |
For example, a processor bowl that holds a stated number of cups is not necessarily approved to process that amount of liquid. Similarly, a stand mixer's bowl size does not by itself tell you how much stiff bread dough it can knead.
What motor power and speed ratings tell you
Wattage (W) commonly describes electrical input under specified conditions, not the mechanical power delivered to the blade, hook, or grinding plate. It is useful for understanding electrical requirements, but it cannot establish food-processing performance on its own.
Peak horsepower (hp), where advertised, describes a different rating basis from sustained operation. A peak figure should not be treated as continuous output or converted into a guaranteed ingredient capacity. Motor design, gearing, cooling, blade geometry, and food consistency also influence the workload an appliance can manage.
Speed and pulse controls help match the action to a recipe, but more speed settings do not guarantee greater cutting force or better results. A whisking speed may be inappropriate for dough, while some blenders require higher speeds for proper ingredient circulation. Follow the directions for the specific attachment and food.
Running limits matter under heavy loads
Check for a maximum continuous run time, required cooling interval, or restrictions on dense ingredients. Dough kneading, heavy shredding, and thick blending can strain a motor differently from thin batters or pourable liquids.
Some appliances include thermal or overload protection that stops the motor when it becomes too hot or overloaded. That protection is a safeguard, not permission to exceed the listed workload. If an appliance stops unexpectedly, turn it off and follow its instructions rather than repeatedly restarting it against the same resistance.
Attachments: verify the whole system
An attachment expands an appliance's functions only when the complete setup is compatible.
- Confirm the physical connection. A mixer drive hub, processor shaft, blender base, and blade mount are not interchangeable interfaces. Check the exact appliance and accessory compatibility information.
- Confirm the required parts. Some tasks need a particular bowl, lid, adapter, food pusher, disc, blade, or guard. An advertised function may refer to an optional attachment rather than the components supplied with the appliance.
- Confirm the operating restrictions. Check the attachment's approved ingredients, speed, fill or batch limit, and cleaning method. A grinder head, dough hook, or slicer may impose limits that differ from the motor base's general specifications.
Finally, measure the appliance's footprint with its working bowl, lid, feed tube, or raised mixer head in place. Storage dimensions alone may not describe the clearance needed during use.
Which Appliance Combination Fits Your Kitchen?
There is no fixed set of food preparation appliances that every kitchen needs. Match the first appliance to the task you repeat most, then consider a second only if it produces a result the first cannot handle well. A blender and a food processor can both make some dips, for example, but one specializes in smooth, flowing mixtures while the other can slice and shred. Different functions matter more than the number of machines.
Match the tools to your regular recipes
| Main kitchen routine | Useful core appliance | Complementary tool when needed | What the second tool adds |
|---|---|---|---|
| Smoothies, pureed soups, and pourable sauces | Countertop or immersion blender | Food processor for frequent vegetable prep | Defined chopped pieces, slices, or shreds rather than another puree method |
| Salads, slaws, chopped ingredients, and batch vegetable prep | Food processor with the appropriate discs | Blender for regular smoothies or finely blended sauces | A contained blending action suited to fluid mixtures |
| Cakes, whipped mixtures, and yeast dough | Hand mixer for lighter jobs or dough-capable stand mixer for supported heavier tasks | Food processor for repeated slicing or shredding | Cutting functions that beaters and dough hooks do not provide |
| Small portions of herbs, onions, and dips | Compact food chopper | Immersion blender for soups and sauces prepared in a suitable pot | Direct in-container pureeing without transferring the food |
| Fresh citrus juice or juice with separated pulp | Citrus press or suitable produce juicer | Blender when smoothies and whole-produce purees are also made | Retention of edible pulp rather than juice extraction |
| Ground meat, fresh-milled grain, or repeatable thin slices | The corresponding grinder, mill, or food slicer | Other specialized tools only for a distinct, regular task | A plate-defined grind, flour or meal, or adjustable repeated slices |
These are function-based combinations, not prescribed equipment sets. A small chopper may be enough for occasional onions and herbs; a full-size processor becomes more relevant when slicing or shredding is a recurring job. The batch sizes and attachments still need to suit the recipes.
Where one tool can cover two jobs
Some overlap is useful. A food processor can make chunky or smooth dips depending on the recipe, while a blender may handle sauces and emulsified dressings. A dough-capable processor can mix some doughs, and a stand mixer with a compatible accessory may take on grinding or vegetable-cutting tasks.
The limits are just as important. A blender does not replace a slicing disc for repeatable vegetable slices. A standard stand-mixer beater does not grind meat. A juicer that separates pulp is not equivalent to a blender that keeps edible solids in the drink. Count a function as covered only when the appliance and its actual accessories support the food and batch involved.
Check the workload before adding another machine
- List the repeated jobs. Separate daily smoothies, weekly bread dough, frequent shredded vegetables, and occasional specialty projects. Frequency changes the value of having a dedicated setup, but it does not change what the mechanisms can do.
- Look for a missing result. If the current tool already makes the required texture and batch safely, another device may mainly duplicate it. If you need consistent slices, separated juice, or flour from dry grains, a different mechanism may be necessary.
- Check the full operating setup. Include the space needed to use, clean, dry, and store bowls, discs, jars, strainers, and powered attachments. A compact base is not necessarily a compact system once its accessories are counted.
- Verify limits before relying on an attachment. Make sure the drive connection, processing head, food-contact parts, and stated capacity match the task. An attachment that fits is useful only if it can safely process the intended ingredients.
Using and Cleaning Food Preparation Appliances Safely
Safe food preparation requires both control of moving parts and clean food-contact surfaces. Before changing a blade, clearing a jam, or disassembling a powered appliance, switch it off, unplug it, and wait for all motion to stop. Then follow the instructions for removing and washing its parts. A sharp disc or grinding knife remains hazardous even when the motor is disconnected.
Before the motor starts
- Assemble the complete guard system. Fit bowls, lids, shafts, blades, strainers, and food pushers as directed. Do not bypass a lid lock, safety interlock, or blade guard to operate the appliance.
- Set up a stable workspace. Use a dry, level surface, keep cords away from hot burners and wet areas, and do not operate equipment with a damaged cord, cracked container, loose cutting part, or visibly worn seal.
- Prepare the food for the mechanism. Cut ingredients to the approved feed size, observe fill limits, and use only foods and attachments the instructions permit. For feed tubes and slicer carriages, position the supplied pusher before switching on.
While processing food
- Keep hands and utensils outside moving mechanisms. Where a processor, juicer, grinder, or slicer has a feed tube or carriage, use its supplied pusher. Only use a tamper through a blender lid if that tamper and lid are expressly designed to work together. Never reach into a running work bowl or feed tube.
- Handle hot food according to the container. Steam and splashing can cause burns. Some blender jars permit warm or hot mixtures with specific fill and lid procedures; some sealed personal cups prohibit them entirely. Check the instructions before transferring hot soup or sauce for blending.
- Stop for a jam, abnormal vibration, or overload shutdown. Switch off and unplug before attempting to clear stuck food or inspect the blade path. If a thermal protector trips, follow the specified cooling or reset process; do not force repeated starts or continue with a damaged part.
Clean and reassemble in a safe order
- Disconnect and dismantle. Wait for movement to end, then remove detachable blades and discs by their designated hubs or grips. Take extra care around slicer blades, grinding knives, and the underside of processor discs.
- Wash approved food-contact parts. Use the cleaning method specified for each bowl, lid, seal, screen, beater, or cutting attachment. Dishwasher permission varies by part; some grain-mill components need dry brushing rather than immersion.
- Remove trapped residue. Clean under seals and around blade housings, feed tubes, pulp outlets, and perforated grinder plates where the design allows access. A suitable brush can keep fingers away from cutting edges.
- Protect the motor and electrical connection. Wipe nonimmersible bases, powered housings, and drive areas as directed. Do not put them in a sink or dishwasher unless the instructions specifically identify a removable part as washable.
- Dry and inspect before storage. Let parts dry as required, check for cracks, damaged seals, dull or chipped cutting edges, and loose fittings, then reassemble or store sharp components with their protective covers.
Keep different ingredients from contaminating each other
| Preparation | Essential hygiene step | Important limit |
|---|---|---|
| Raw meat grinding or slicing | Keep raw meat and its juices away from ready-to-eat food; wash hands, tools, trays, and food-contact parts with hot, soapy water after handling | Grinding does not destroy bacteria. Cook ground beef, pork, lamb, and veal to 160°F (71°C), and ground poultry to 165°F (74°C), checked with a food thermometer |
| Fresh fruit, vegetables, and juice | Wash produce under running water before cutting or extracting; clean strainers and other juice-contact parts after use | Juicing does not pasteurize the drink. Untreated juice carries greater risk for people vulnerable to foodborne illness |
| Ready-to-eat dips, sauces, and cooked foods | Use equipment cleaned after raw ingredients; avoid reusing an unwashed blade, bowl, or pusher | Refrigerate perishable preparations promptly rather than leaving them in a processing container at room temperature |
| Dry grains, spices, and coffee | Remove retained flour, spice particles, and oils with the approved cleaning method before switching ingredients | Do not wash a mill or grinder with water when its instructions specify dry-only care |
Regular cleaning does not replace inspection. If a blade, guard, lid lock, cord, or drive coupling is damaged or no longer secures correctly, stop using the appliance until the problem has been resolved according to its instructions.